
Lately I was busy, so this post comes with some delay. So without further due let me share with you the next steps.
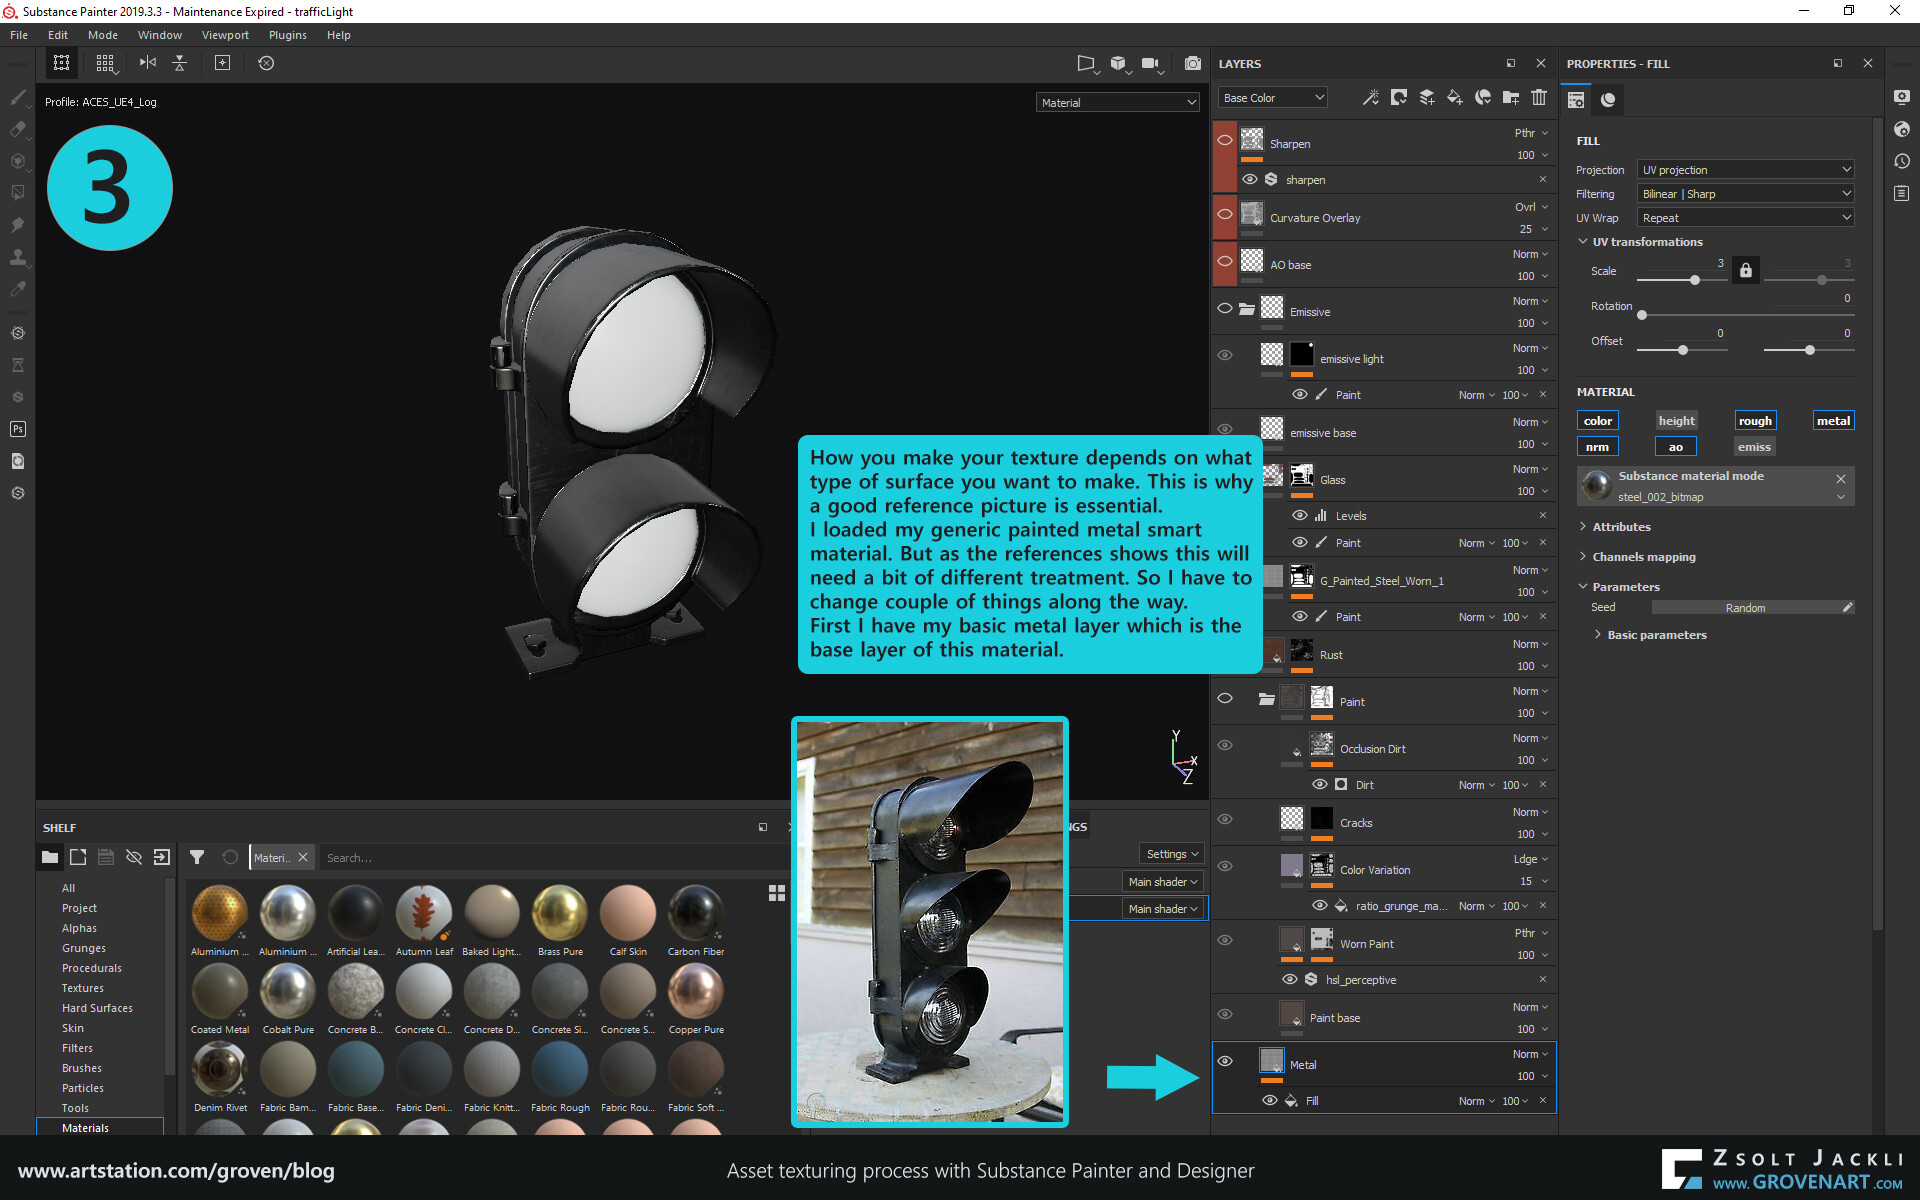
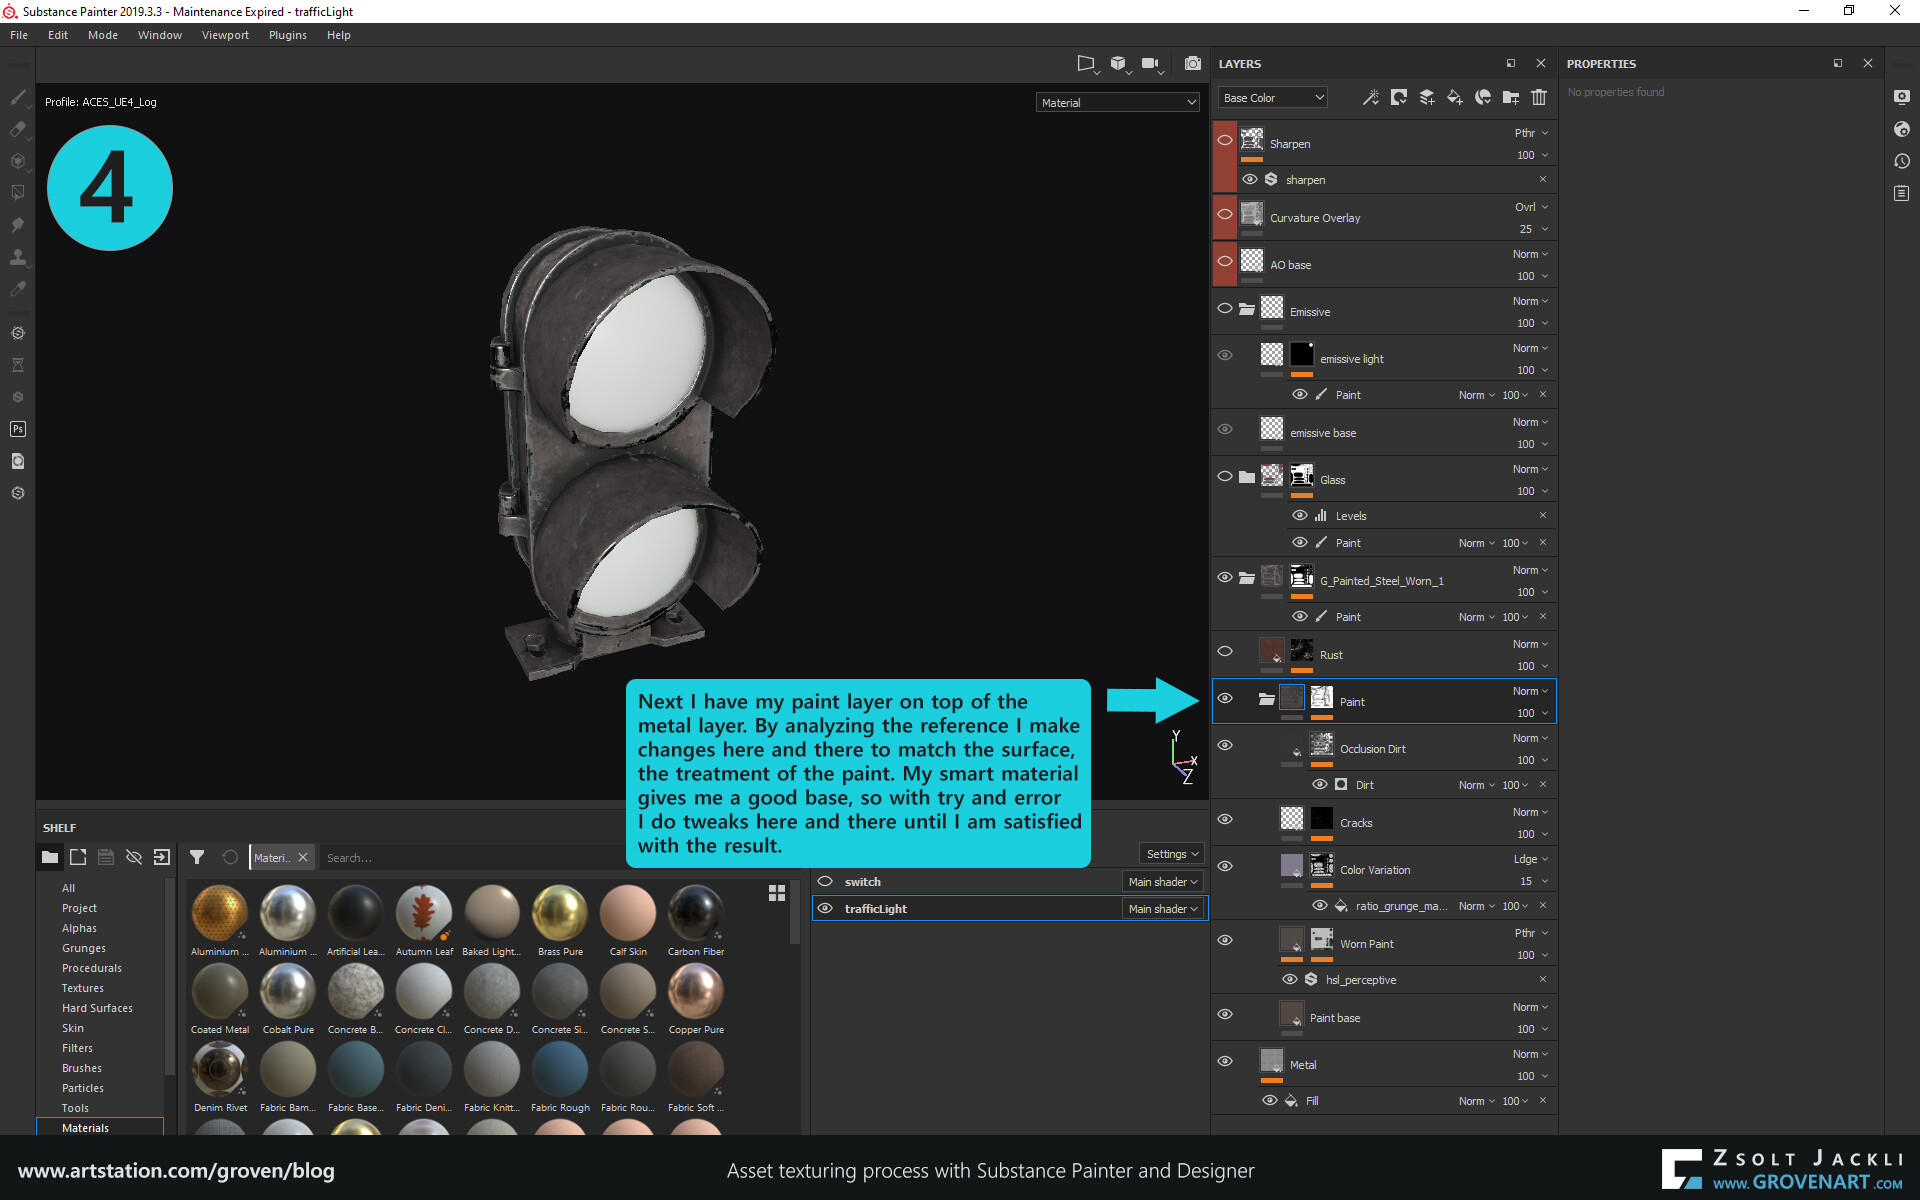
In my previous post I talked about how I generally approach texturing and also briefly touched the topic of materials. Now let`s dive into these a bit more.
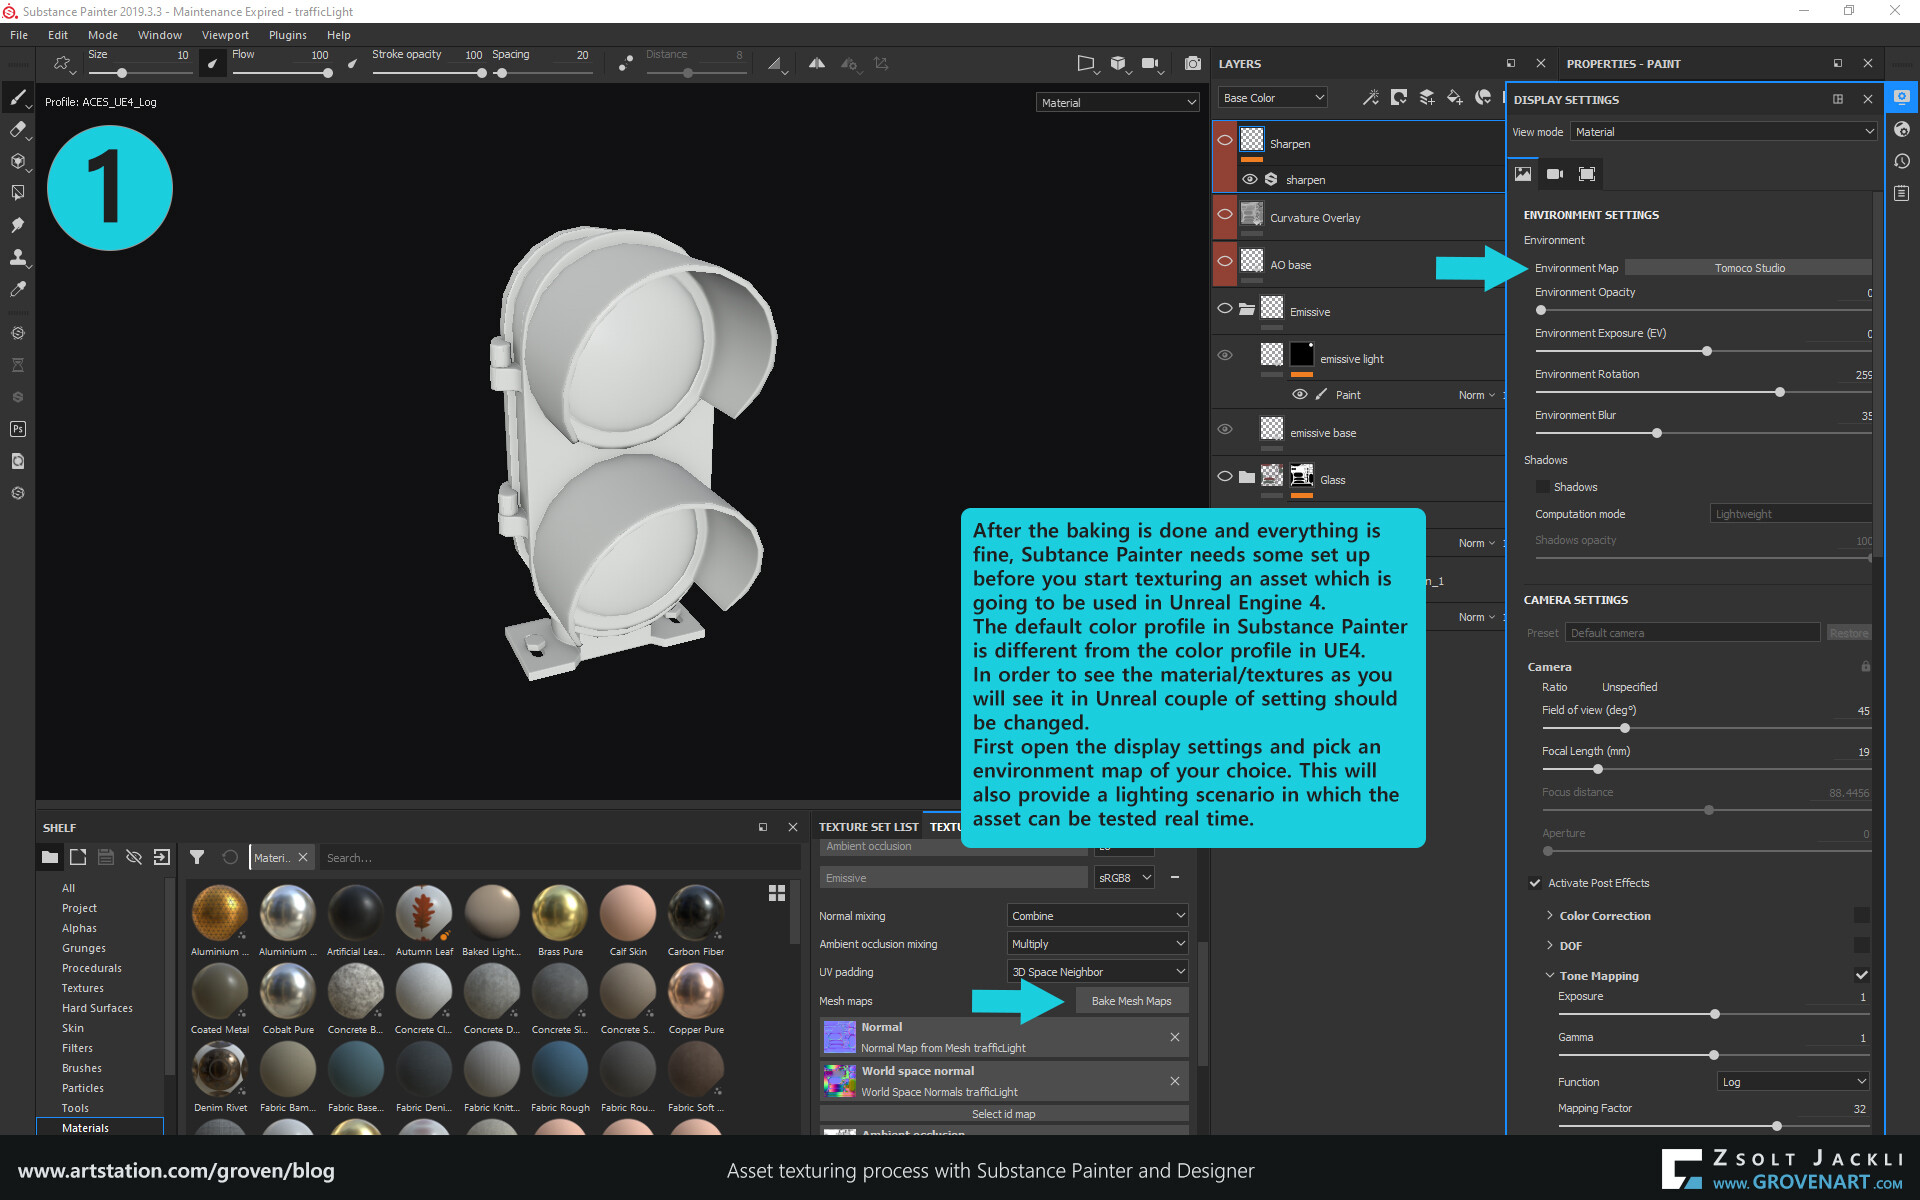
When you do a project in a game engine and work with a workflow like PBR it is really important to test the textures and setup a basic material in the engine as soon as possible. In my projects usually this is why I have a First texture pass, master material setup in game engine phase. When I do texturing I tweak the textures and the lighting together and try to synchronize them so they can work together. For the sake of project tracking I separated these in different phases but they are connected. So they have to be handled together.
This workflow is all about lighting and how the materials react to the light. If you do not get the basics right from the beginning the whole thing can easily fall apart and you can not create a certain look (meaning the metal surface feels like a metal surface) or create believable materials. For instance it can happen that for the first try the textures on the object looks too dark. A common trap is that you crank up the light intensity to get more light and make the object look brighter. But this can result that your whole scene will get too much exposure and you get a blown out image. Instead, check if:
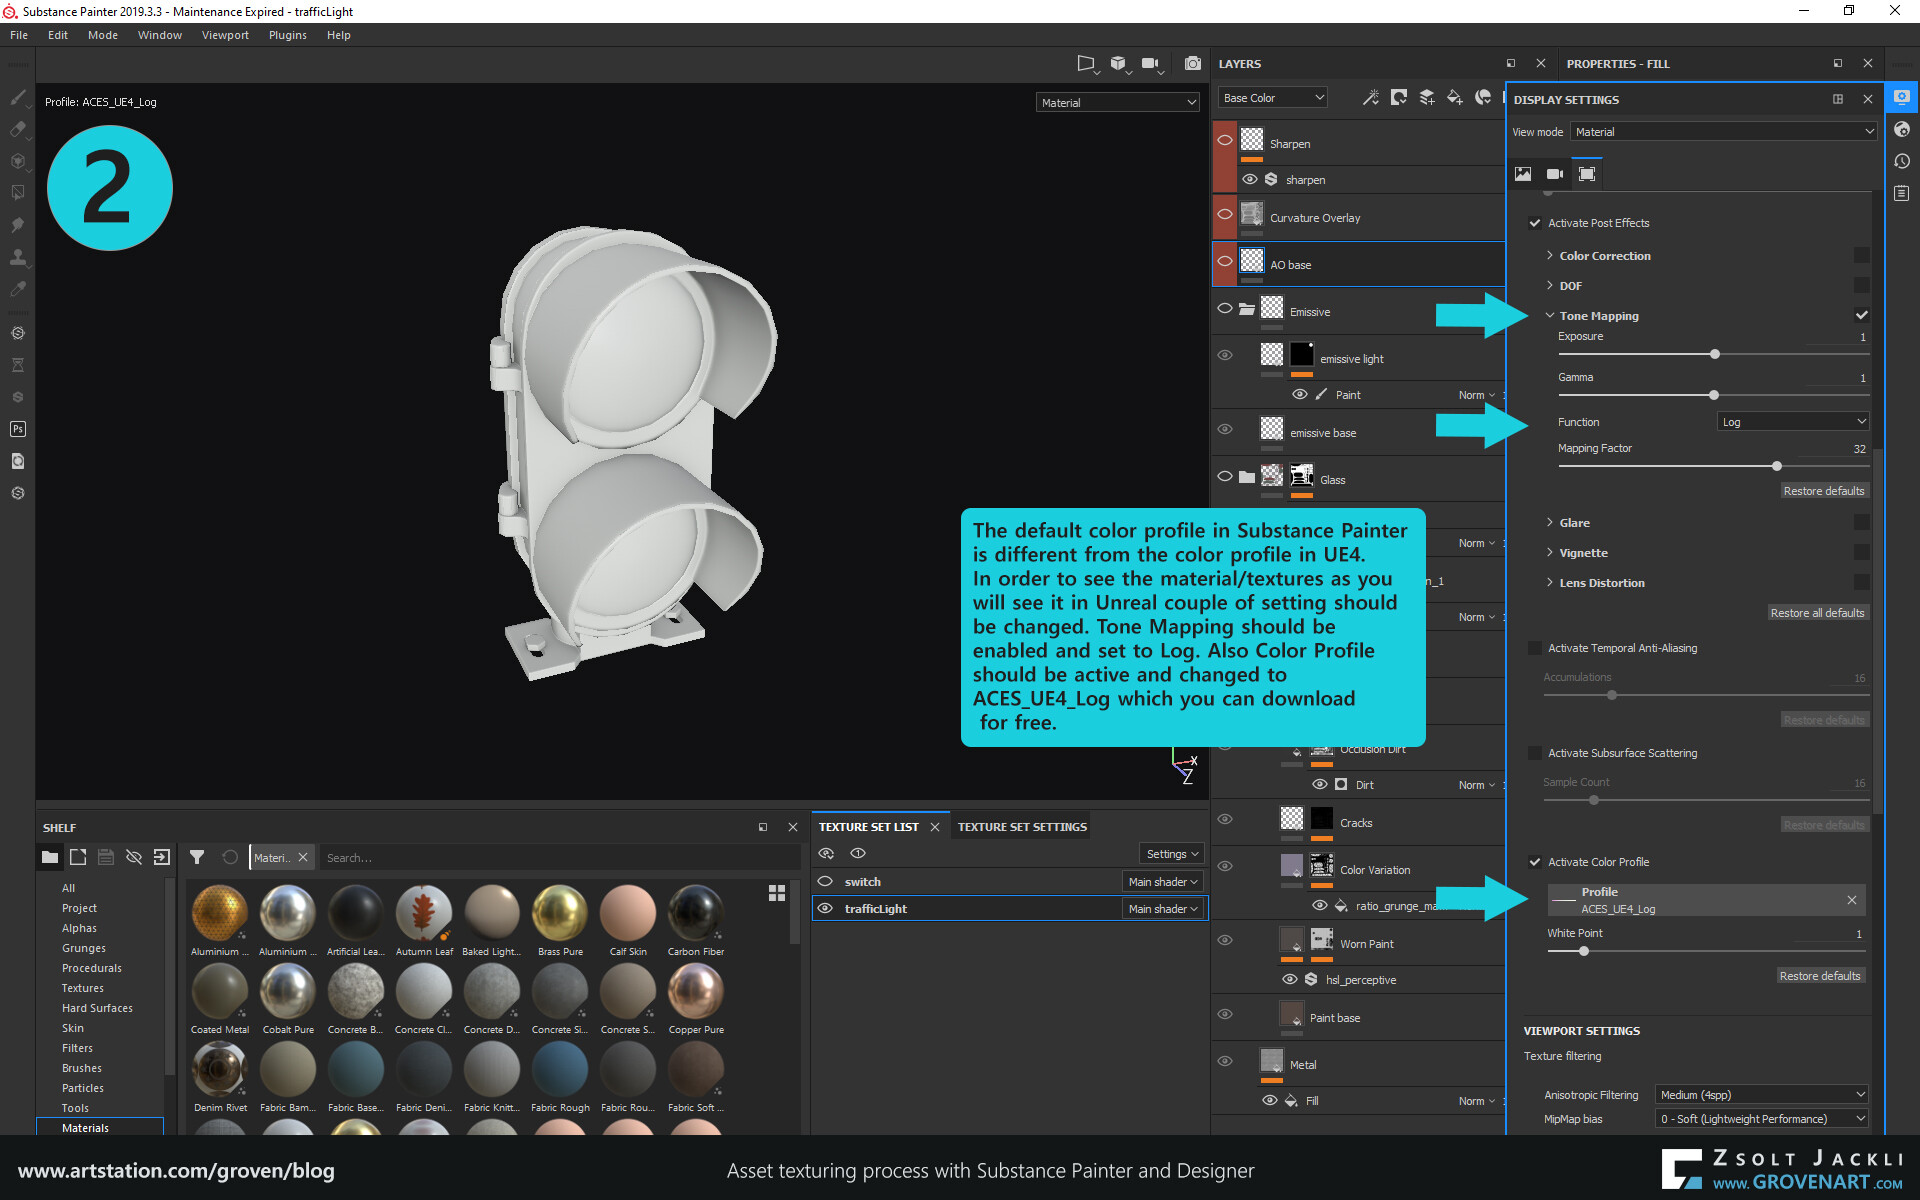
- the color profile setup in the texturing software matches with the engine color profile setup
- the value of the color isn`t it too dark
- the roughness has the right values for the material you want to create and has enough variation
In most cases this can solve the issue but of course small tweaking in the lighting itself might be needed too.
9. Second texture pass + Second lighting pass in game engine
After the first pass I take a short break to clear up my mind. Looking at the same thing over and over again can cause you miss something. So I after the break I look at the whole scene again to identify what has to be changed or what is wrong. Based on my observations I did the following changes:
- I changed some lighting setup. The inverse falloff was disabled so I enabled it, tweaked the settings of the lights to get more soft shadows and a nice vertical gradient in lighting
- I was not really happy with the roof and roof structure so I did more studies (checking images, doing sketches) and based on that redid it
- I repositioned some of the objects so they look better placed from camera view
- I added some details to models and more props like bolts on the table or cables on the wall
- I added more division to the window frame to emphasize its scale
- Hanging light was out of scale, so I redid the whole model
- I made some of the color textures brighter
After all this I moved to do the second texture and lighting pass. In this pass I tweaked lighting, camera, materials and texture settings to make them harmonize with each other. I also started to play with the postprocess effects, mainly because how I set up the emissive. It requires bloom to be enabled to make it work properly. Image below shows the progress from first to second texture and lighting pass:


This asset I used as an example above looks rather clean. I mean there is not too much dirt or dust on it. The reason for this is I add a dust layer with the material in the engine.

Stay safe! See you next time!