
I hope you enjoyed reading the introduction part of this project and you are ready continue to learn what I am about to share with you today.
Continuing where I left off last time the next step based on the project structure I made is only two words:
7. Refine blockout
This step covers way more than these two words say but for me they describe pretty well what I have to do here. This process can be really time consuming and contains a lot of things so I usually divide it to two major tasks and those tasks have subtasks. So when I say refine blockout I mean the followings:
TASK 1:
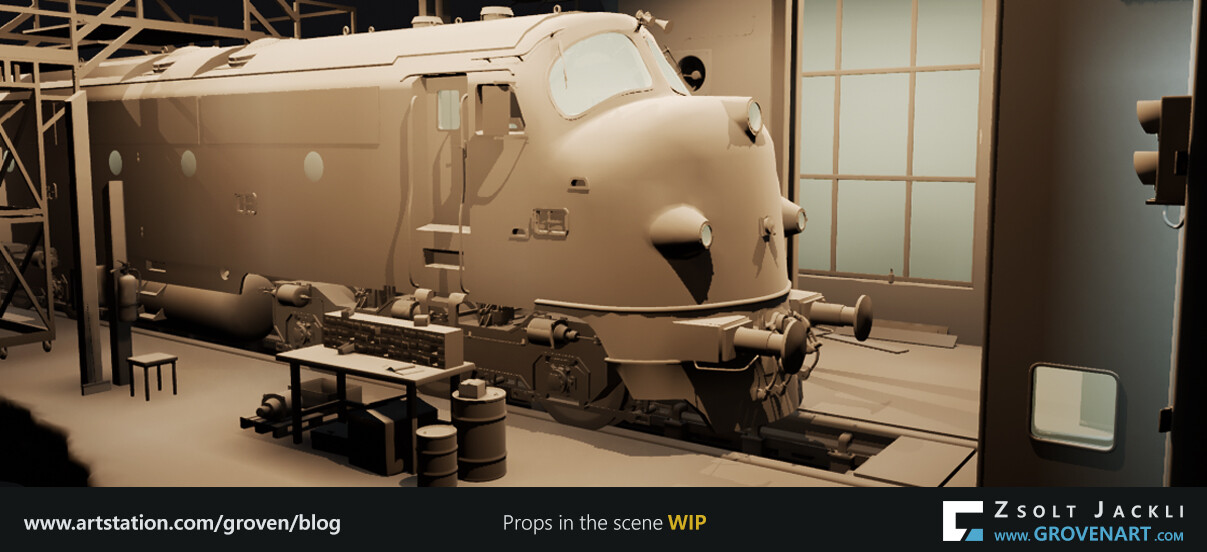
Add more details to the blockout: Basically I revisit what I have created so far and adjust their shapes if necessary and/or add more elements helping to communicate the story, functionality or the scale of the object. For instance I added a door to one of the walls. Everybody has a basic understanding how big a door is. It is used every day and pretty simple how it works. It was designed to separate and connect spaces and be able to open it and go through the hole it covers if you need to. For 3D artists and also for the viewer a door can be a reference point. It helps to communicate the size of the assets in an environment where there are no characters. Furthermore the relation between assets in terms of scale can be understood better.

Populate the scene with props: As you could see in the previous post I placed only the most important elements to build up the scene, but I did not placed any props. The reasons for this are 1) I didn`t need them for the first lighting pass, 2) I simply did not have them at that time.:) When I collected references I did it for the props as well. I looked for those in particular which could help to tell the story I have in mind. After revisiting old ones from my own asset collection and creating new ones which were missing for this project I started to place them based on the cameras in the scene. I tried to come up with an interesting mini dioramas within the support the story. Among the props there are tables and stools. These are simple objects. In many cases they do not even get to much attention by the viewer but they have an important role. They serve the same purpose as the door mentioned above. This way not only the exterior part but the interior part of the scene have scale references that anybody can relate to.
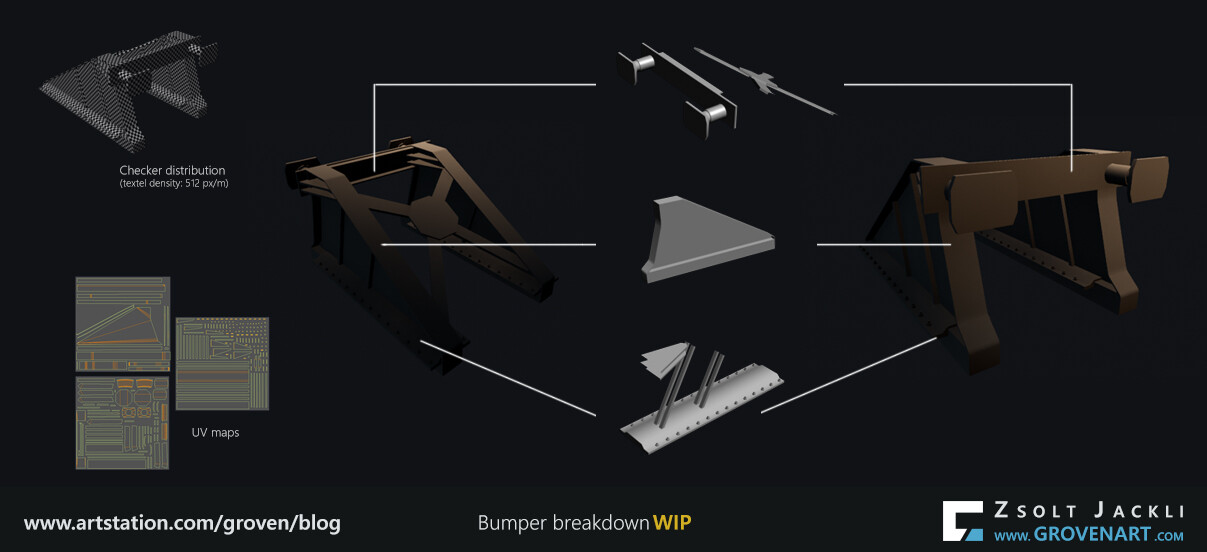
Pushing vertices: After I am happy with the results I have so far I start "pushing vertices". When I go for a workflow where I have to bake maps my models are more like midpoly models rather than low poly models at this stage. I use this approach because it is faster to create the low and high poly version of the objects using a midpoly model than making everything from scratch. I did UV the assets for the first lighting pass, but in this step I adjust the UV for each of every low poly model with the targeted texel density in mind (If you are not familiar with texel density, check out this tutorial by Leonardo Lezzi). The texel density I set up is 5,12px/ cm, so basically 512px per meter. This usually used for games having third person camera as their main game camera. But I did not pick it for this reason. I picked this number after did some tests and turned to be a good match for what I am aiming for in terms of texture density. With this I can get enough resolution for the textures but it has a big impact on how I create the low poly version of the models for big surfaces such as the floor, walls, etc. and how I texture these assets.
At this point an important question needs to be answered: If the whole UV on the first UV channel of a model does not fits into the 0-1 UV space but the texel density is this big, then what can I do to be able texture the assets properly? The method I used to answer this question is breaking the assets into pieces or making a modular kit out of them and assembling everything in the engine.
Let`s see examples how I made the low poly version of some of the assets :
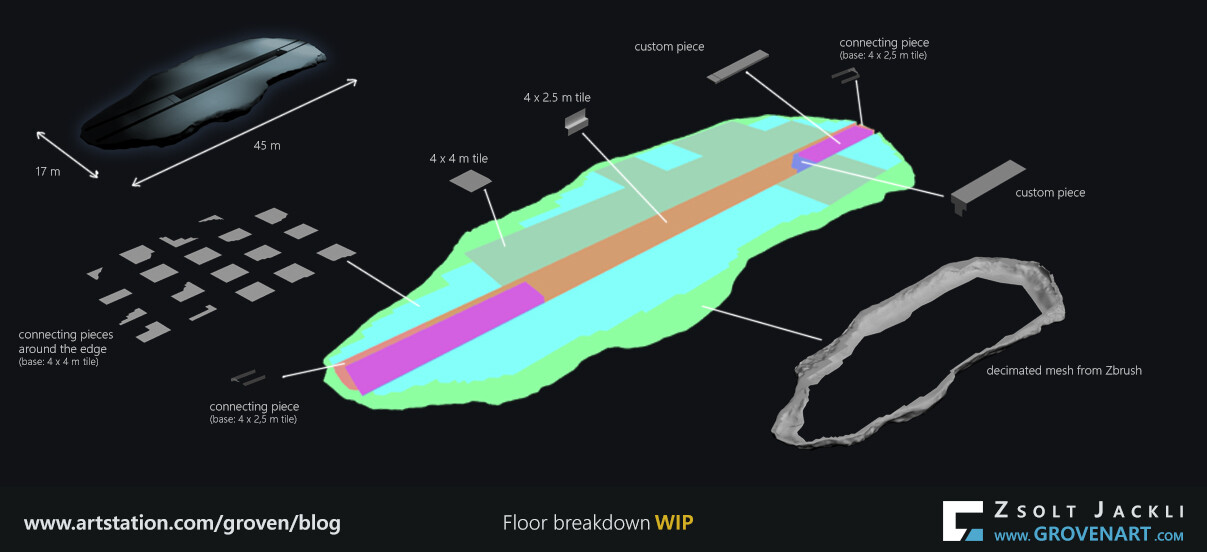
These objects are grouped together in Unreal. Not only because it is easier to manage them, but in Unreal the Lightmass system has the tendency to bake different objects in different clusters. Different pieces gets different lighting causing lightseams and these should be avoided. By grouping the objects together Unreal will read the objects as one big object. Therefore the pieces used to build up the whole model will be rendered as one keeping their original lightmap density. As a result the bake is nice and clean without seams.
To group objects in Unreal without losing lightmap density creating a group with selected actors or placing the pieces in a blueprint could be a solution. To group actors just select all the objects you want to group together, press right click on them and select the group from the dropdown menu (default hotkey: Ctrl+F). Blueprints are really powerful but they have their limits. My experience is that placing more than 40 meshes in a blueprint can cause errors. For instance the assembled floor presented above made of 53 pieces all together. First I thought it was better to group the modular pieces together than using blueprint. But for some reason grouping actors did not solve the lightseam issue even if I deleted all the previously baked lightmaps and rebaked them. I created a blueprint but that gave an error for the casting shadows because the assembled floor was way too big. Luckily the floor the base of the whole diorama scene so it doesn`t have to cast shadow on anything. To solve this temporarily I disabled the cast shadow for each floor pieces in the blueprint. The Lightmass settings are related to this issue as well so I will do more tests to find the right solution.
Important to highlight that if you are aiming to group objects for light baking Merge actors can also be used but in this case better to avoid it if it is possible. As its name indicates it merges everything together. If I had used it for the floor it would have combined not only the meshes but also the 2nd UV channel of all the pieces into one UV reducing the lightmap density drastically. This would have been visible on the quality of the baked lighting of the object. To compensate this I should have doubled or more the lightmap resolution of the object which would have lead to longer baking times, bigger and increased number of lightmap files. Its result still wouldn`t have looked good enough for such a big asset.
Basically this covers what I mean by "pushing vertices". This step can be really repetitive and it has more technical aspects than creative ones in the creation process but without it can not proceed. So must be done. The good side of it that your technical skills can really shine here and you can come up with new methods to speed up or simplify your work.
Stay safe and see you next time!